Sunday, 29 June 2014

cranberry white chocolate cookies (40 to 50 pieces)

Cranberry. Another superfruit. Some of my female colleagues are crazy over cranberries due to the fruits' superpower to prevent Urinary Tract Infection.
Cranberry cookie -- definitely an irresistible snack for the health conscious (if you can ignore the amount of sugar that is compressed in a little piece of cookie heh).

So this recipe was found by my friend, S online -- Good Food, Shared. It is a pretty cool blog with step-by-step tutorial recipes, mainly pastries and desserts. Will revisit the blog for more!

Recipe extracted from Good Food, Shared [Please refer to the awesome link for step-by-step description :)]

Ingredients:
150g butter
125g soft light brown sugar
100g caster sugar
2tsp vanilla extract
1 Large egg, straight from the fridge
1 Large egg yolk (also from the fridge)
300g plain flour
1/2 tsp bicarbonated soda
150g dried cranberries
200g white chocolate

Steps:
1. Preheat the oven to 170ÂșC
2. Line either one large or two smaller baking sheets with baking paper and set aside.
3. Melt the butter, set aside to cool slightly- this prevents it from cooking the eggs. Mix the two sugars together then pour the now slightly cool melted butter and mix until the mixture is well combined.
4. Add the vanilla extract and the eggs, mix slowly at first then increase to full speed.
5. Mix on high for 3-5 minutes until the mixture is pale and creamy. Weigh the plain flour, add the bicarbonate of soda and give a quick stir to combine.
6. Add the flour in two batches to the egg batter on the lowest speed and mix enough to just combine.
7. Meanwhile roughly chop the white chocolate into thumbnail sized pieces.
[we bought chocolate chips so there was no need to chop. However, due to Singapore's sweltering weather they quickly melted into unfavourable lumps]

8. Add the dried cranberries and the white chocolate to the cookie dough, barely mix together. Overworking the cookie dough will lead to tough cookies. 
[I guessed we really over-mixed it. Would come to that later.]

9. It is recommended that the cookie dough remains completely cool, so either place in the fridge between batches or place the whole mixing bowl in a basin of ice. Place walnut sized pieces onto the prepared baking sheets.
10. Place the cookies about 4cm apart as they will spread while baking. Bake in the center of the oven for 14 minutes or until they lightly toasted around the edges and a light golden colour.
[and G decided to be creative and mould the dough into heart shapes]

11. Leave to cool on the baking tray for 4-5 minutes, the cookies will harden as they cool.
12. Cool completely on a wire rack.
[S warned us that these were not pressed cookies, therefore the shape would not stay. We only found 1 close-to-perfect heart shape at the end of the baking session.]

cranberry white chocolate cookies

Masak-thoughts: Taste was great. But why was the texture so rough!
I found the cookies really tough too. WAY TO GO!~

Less is more when it comes to dough. 
Overworked dough is a baker’s worst nightmare and it often comes down to temperature. Ideally, you want the kitchen to be cool before you start handling the dough. If yours tends to heat up quickly, work the dough first before turning on the oven. Silverton recommends that you “handle the dough as little as possible and always use your fingertips because they’re cooler than your palms.” When rolling the dough, start from the center and work your way out, flouring the surface and dough as you go. “People are afraid of flour,” Jackson says. However, “if the dough has enough flour in it, don’t be afraid to use enough flour to roll it out. Otherwise, you’ll overwork it.” You can tell when cookie and pie dough is overworked because it will be stretchy and sticky, resulting in poor texture—and results. Deborah Racicot, pastry chef at Gotham Bar & Grill in New York City, says, "If it is a pie crust, the dough will be tough and taste like cardboard. For a sweet dough, the butter may leach out, and be greasy, or even tough.”
[From: http://www.womansday.com/food-recipes/cooking-tips-shortcuts/10-baking-tips-from-the-pros-117036]

Sunday, 22 June 2014

blue berry pie bars

Blue berries are packed with lots of Vitamin C, E and anti-oxidants. They are known to be "brain-food" and can be helpful for those who are combating body fats.
Not to mention these indigo-painted berries look so appetizing and easy to chew -- Once you pop, you can't stop. I am not sure whether these health benefits are retained after being cooked, anyhow it does not stop me from introducing them as the "lead character" today.

My friends (S and G) and I decided to meet for the last time before the preggie goes on maternity leave/ confinement. So what better way can girlfriends spend time together on a weekend afternoon? Yes, we baked.

S, being our shifu (master) whipped out her mobile phone and introduced us the website Foodgawker.
It is a platform to search for food blogger recipes and even if you are not a kitchen person, you can feast your eyes with those pretty pictures of food. :)

After browsing Foodgawker for some time at the supermarket (and being constantly distracted by the random mascots promoting their items), we decided to grab 3 boxes of blueberries and challenge the blueberry pie bars recipe (we made cookies too but I shall leave that for another post).

The strawberries were on sale but S opined we should stick to blueberries as strawberries contain more moisture and we might be setting ourselves up for failure if the pie turned out to be too moist.

Recipe extracted from Kleinworth & Co.

Ingredients:

Crust & Topping
1 1/2 cups all purpose flour
3/4 cup sugar
pinch salt
1 1/2 sticks cold butted (cubed)

Filling
3 cups fresh blueberries
2 eggs
1 cup sugar
1/3 cup all purpose flour
1/2 cup sour cream
pinch salt

Steps:
1. Grease 9x13 glass baking dish- set aside.
2. Preheat oven to 350 degrees.
3. Add flour, sugar, salt & cubed butter to mixing bowl, beat until combined & crumbly.
[But I continued until it became creamy...forgot that the crust should be crumbly!]

4.Take 1 cup of mixture & set aside. Take remaining mixture & firmly press into your baking dish, covering the bottom.
5.Bake 15 minutes.
6. While crust is baking- whisk eggs in a large bowl.
7. Add sugar, sour cream, flour & salt.
8. Gently fold in blueberries. Set aside.
[Look at the happy berries swimming in the mix!]

9. When crust is ready - remove from oven & add filling.
[Remember to bake the bottom crust before adding the swimming blueberries!!]

10. Gently spooning over the top of the crust.
11. Sprinkle with remaining crust mixture you had set aside.
[I over-beaten the mix and it became creamy. Thus the texture of the top crust.] 

12. Bake 1 hour or until top is lightly browned.
[Meanwhile, you could do a lot of things in an hour with your girlfriends..such as napping and going into stone mode. We could smell the sweet crust when the pie was baking in the oven. Berries bursting (literally) in happiness under the heat. Pure excitement!]

13. Cool before serving if eating alone. If serving warm add a scoop of vanilla ice cream on top.
[We didn't have ice cream but it's already oh-so-yummy!]

blue berry pie bars

Masak-thoughts: Shopping for ingredients alone requires certain level of knowledge and some calculation. For example, I didn't know there are so many different types of flour *noob*.
S told me that the ang moh (western-style) pastries are usually very sweet, especially so when the recipes are created by the Caucasians due to taste preferences. So take note and adjust the ingredients to your liking (we reduced the sugar by about 20% or even more..)!
Oh yes, it doesn't matter if you beat the crust mix for too long that it turns creamy instead of crumbly, it still tasted good, or so I think. It was also less messy when we cut and packed the pie into bars (but of course the top layer was not as aesthetically pleasing).
The sour blueberries complement the sweet crust, totally yums! ^.^ I would not have attempted the recipe without the ladies!

Sunday, 15 June 2014

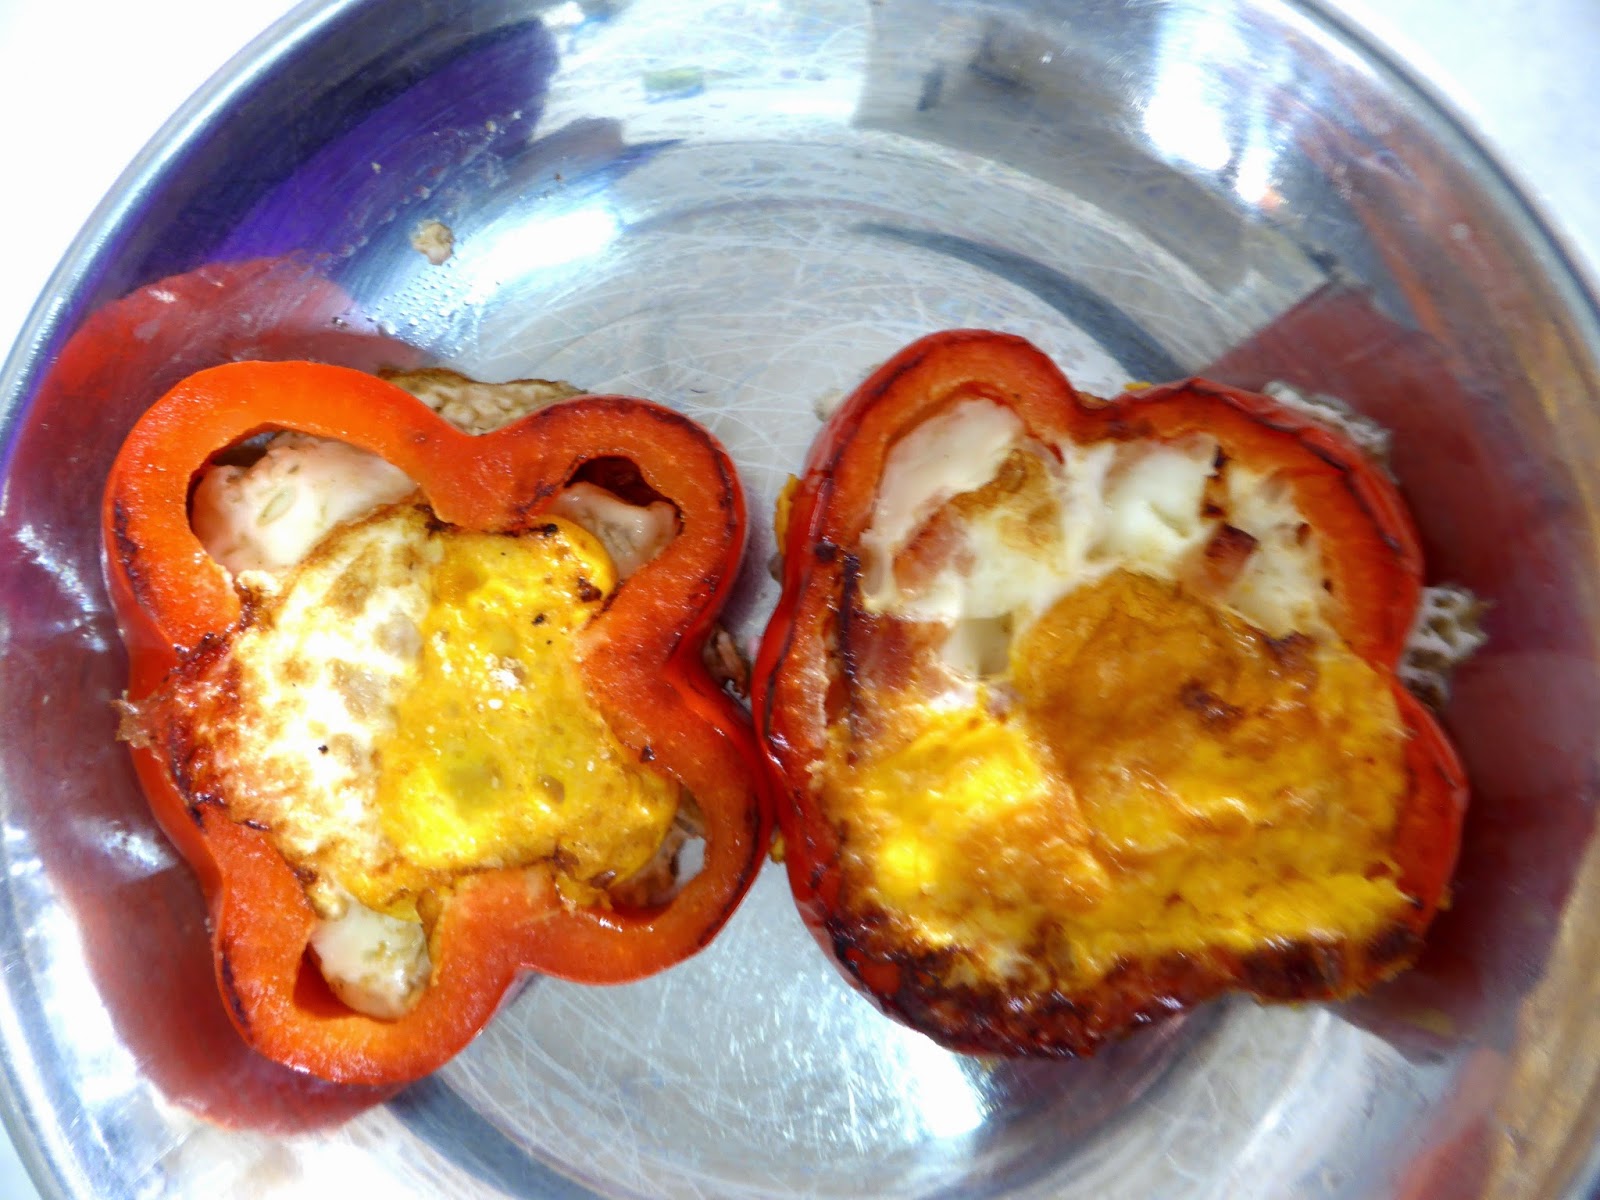
egg in capsicum slice!

And so, I had been wanting to try this which went viral some time ago.

Starting a blog like this motivates me to enter the kitchen. Frying an egg, chicken feed lah (ridiculously easy)! Or so I thought.

Look at the pretty capsicum. @.@

I happily emptied the content in the capsicum and followed the steps. Even added dices of ham in the egg, thinking I had everything under control. 

To my horror, splatters of oil started going wild and I went hysteria over what I saw:

The egg leaked through the bottom of the capsicum slice and there you have, capsicum omelette (slightly charred)?

I cheated and cut away the edge...
egg in capsicum slice

Masak-thoughts: It was really disappointing, I guess this seemingly easy task requires some culinary skills. I did a quick search on Google and found out onion slices work too. Taste was so-so, the savoury ham did make it taste better though. Anyway, had a good laugh with my mom whilst admiring the pathetic eggs.

Oh yes, and Happy Father's Day. My dad was not at home to witness this tragedy...hehe.

Tuesday, 10 June 2014

sesame oil chicken + black fungus (Serves 4 to 5 pax)

My first challenge given by my mum -- Sesame Oil Chicken. Sounds complicated to those who lament "me no cook"? Fret not.

We played cheat by buying steamed chicken from one of the hawker stalls. In that case, you don't even have to worry about your chicken go uncooked. *maniacal laugh*

Ingredients:
Black fungus (to clean by soaking them in water for several hours)
Half steamed chicken (cut; usually already dripping with gravy)
Salt
4 tablespoons of cooking oil
Half a tablespoon of dark soy sauce
A packet of sesame oil which comes with the steamed chicken
2 tablespoons of Chinese rice wine (optional)
A few pieces of sliced ginger

Steps:
1. Add the cooking oil and stir-fry the ginger.
2. Add the fungus + a dash of salt. 
3. Throw in the steamed chicken. Continue to fry. Add dark soy sauce for the colour. 
4. Add the packet of sesame oil for the taste.
5. After some minutes of tossing the chicken, you may feel the ache at your bicep. Add some rice wine if you want the flavour.
6. Cover the lid and allow the content to simmer for 3 minutes.


sesame oil chicken

Masak-thoughts: It was scary to hear the explosive "PSSSSSSSSST" sound when the black fungus landed in the wok. And do note that this hassle-free method does not apply to cooking raw chicken.
The excess water in the ingredients may cause oil to splatter so just beware...stand away from the wok or remove the excess moisture as much as possible before dumping them into the wok! Not a bad first try afterall! :)